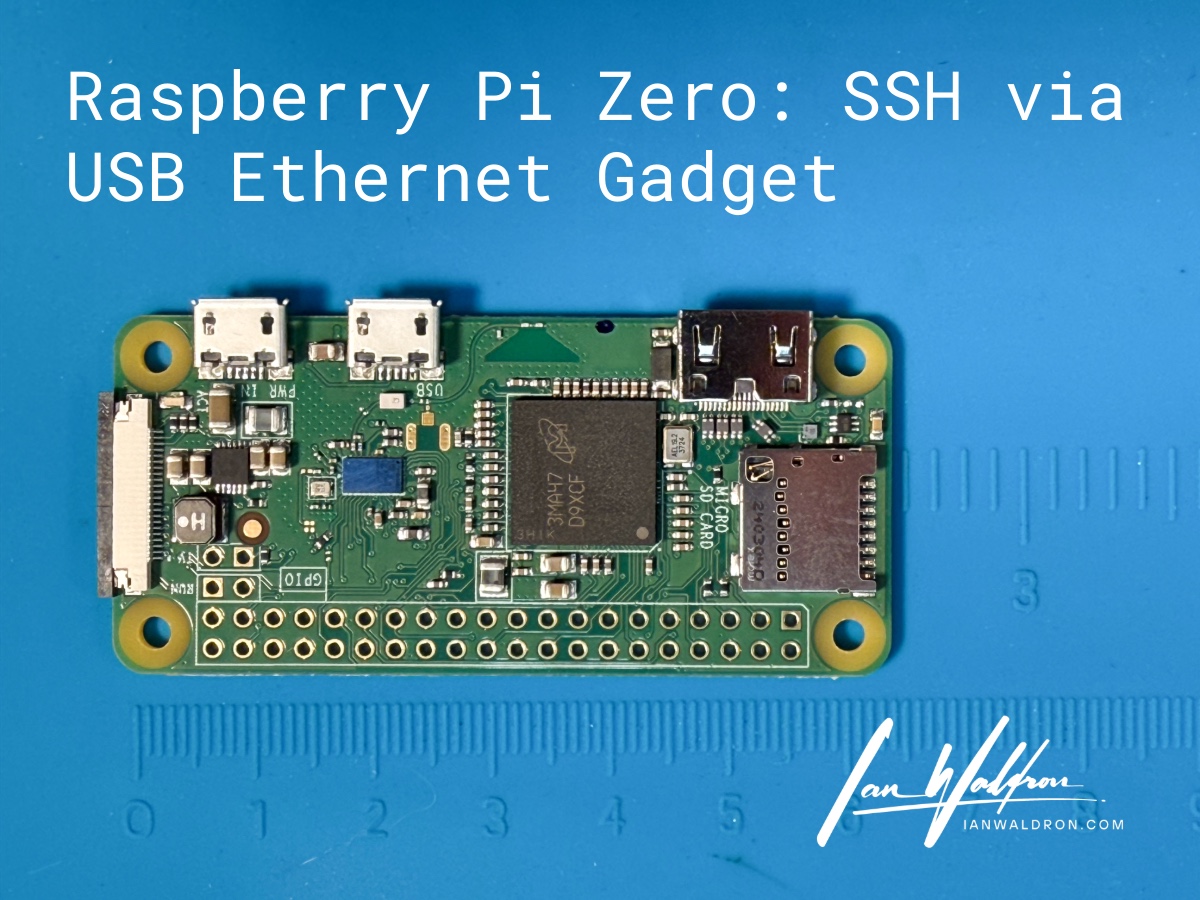
Background
I have a project needing a bit more than a simple microcontroller. It requires a camera module for a particular task and the Raspberry Pi Zero as a complete, albeit small, computer excels in these situations. Before I can get to the task, however, I need to get onto the Pi with a direct tether. This has proven challenging.
This article will explore the issues encountered, paths explored, and hopefully conclude with a working solution. While I'm somewhat competent in this domain, I'm by no means an expert on Raspberry Pi and this isn't an expert tutorial. Instead, these are my notes from trouble shooting a problem. I share this in the hope my lessons learned will help another stuck as I was.
Requirements:
- Raspberry Pi Zero
- microSD card flashed with Raspberry Pi OS Lite (32-bit)
- USB-C (Mac) to Micro-B data cable
- Raspberry Pi Imager (v2.0.4)
First Pass
While there's no official documentation that I'm aware of for establishing a USB gadget tether, there's plenty of third-party resources on how this can be reliably done. I'll quickly run through those steps.
We'll start by flashing our OS to the SD card. If you don't already have "Raspberry Pi Imager" installed (henceforth I'll call it "Imager" for brevity), you can do so on Mac with brew install --cask raspberry-pi-imager from a terminal window. Since we're already in terminal, we can then launch it with open -a "Raspberry Pi Imager" and you should see the application shortly launch.
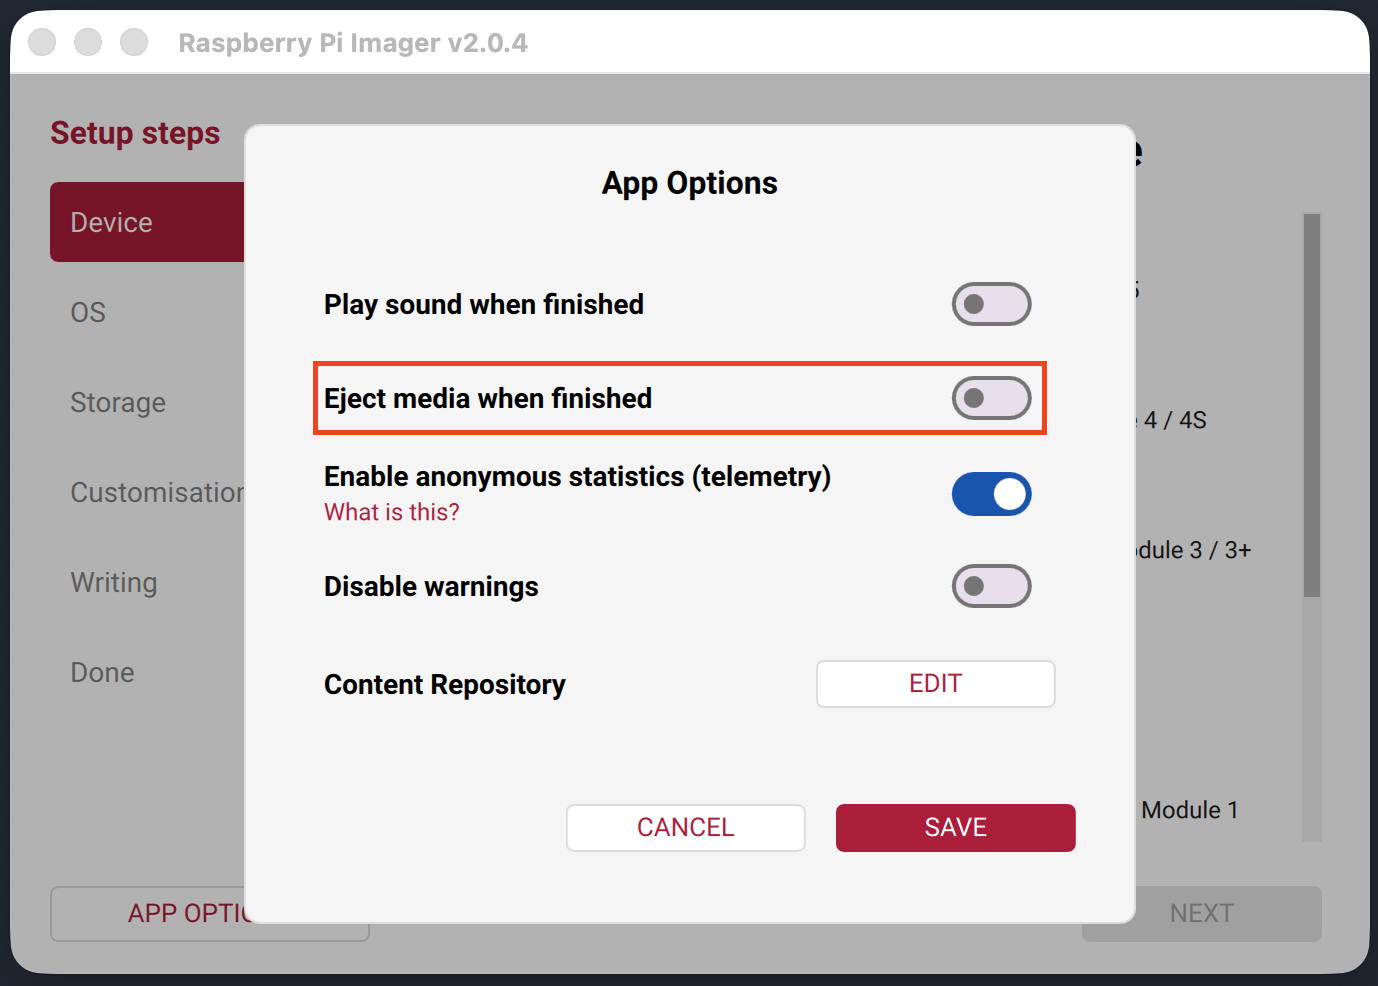
Because I want to work with the files on the drive directly, I'm going to disable the default eject/unmount that occurs following the write/flash. This option is available under "APP OPTIONS."
Now run through the steps to flash the card. I'm using the "Raspberry Pi OS Lite (32-bit)" operating system. For "Customization," choose a hostname, create a user, and make sure SSH is enabled. I'm electing to use password auth for my purposes. Because I'm using SSH directly over the gadget tether, I'll leave Wi-Fi config blank. Once through the configuration steps, click "WRITE" and watch the magic happen.
When the write completes, we'll have a mounted drive called "bootfs." Let's inspect the Volumes directory to make sure that's the case.
ianwaldron@Ians-Mac-mini ~ % ls -l /Volumes
total 12
drwx------@ 1 ianwaldron  staff  0 Jan 19 07:59 bootfs
lrwxr-xr-x  1 root        wheel  1 Jan 12 07:28 Macintosh HD -> /
ianwaldron@Ians-Mac-mini ~ %
In bootfs, I'm going to edit two files: cmdline.txt and config.txt. You could edit these files with a text editor or directly in terminal. I'll just use nano since I have a terminal window open.
In cmdline.txt, I'm going to add modules-load=dwc2,g_ether directly after rootwait separated by a single space. These two drivers are needed to establish the gadget tether.
You might see something like cfg80211.ieee80211_regdom=US (or localization specific to you) after rootwait. This only affects Wi-Fi and is irrelevant to the gadget tether but it's not doing any harm being there. I'll leave it.
You'll probably see resize there too. Be sure to leave this so the drive partition is expanded on first boot to consume the space available or you'll have to do this manually once you have SSH established.
Next, let's work with config.txt. I'm going to add dtoverlay=dwc2 at the very bottom of the file and/or under the [all] section (if it exists). This line allows the USB port to function as an Ethernet gadget.
Last, I'm going to add a file "ssh" in the boot directory at the same level as the previous files with touch /Volumes/bootfs/ssh. This will ensure the SSH service is enabled. It will be automatically deleted on first boot.
With the above changes made, let's safely eject the drive (diskutil unmount /Volumes/bootfs), insert the drive into the Pi, and connect the Pi with a USB cable to the data port.
Be sure to use the inner of the two USB ports on the Pi! The outer of the two is for power only.
After waiting 60-90 seconds for the first boot, I'm going to see if I have SSH available using the user and hostname set with Imager.
ianwaldron@Ians-Mac-mini ~ % ssh pi@raspberrypi.local
ssh: connect to host raspberrypi.local port 22: Operation timed out
We do not have a good connection. Sigh.
Solution
It turns out, in October of 2023 Raspberry Pi upgraded the Debian image to Bookworm (now Trixie at the time of this writing). With this, NetworkManager becomes the networking control mechanism replacing dhcpcd. Problem spotted. With NetworkManager, we need a connection profile to utilize the USB port as an ethernet adapter directly.
Power down the Pi and mount the SD card once again so we can add this file.
sudo nano /Volumes/bootfs/usb0.nmconnectionNetworkManager connection profile files carry the .nmconnection extension. Additionally, the interface is generally used as the filename but you could use whatever you'd like. All .nmconnection files will be loaded and inspected by NetworkManager.
What does need to match, however, is the "interface-name" setting within the file as seen below.
# usb0.nmconnection
[connection]
id=USB Ethernet
type=ethernet
interface-name=usb0
autoconnect=true

[ipv4]
method=auto

[ipv6]
method=disabled

[ethernet]
It might be tempting to define a particular IP address in the [ipv4] section. However, if you plan on enabling internet sharing from your primary machine across the tether to the Pi, this will likely interfere. Last, I've disabled IPv6 connections to keep things simple.
Now safely eject/unmount and let's try connecting once more. Give the Pi another 60-90 seconds to boot, though start up should be quicker this time.
ianwaldron@Ians-Mac-mini ~ % ssh pi@raspberrypi.local
# enter pw etc ...
pi@raspberrypi:~ $
And we're in.
Additional Information
Now that we've established ssh with the Pi, we'll do what every good Linux user does and run a quick sudo apt update && sudo apt upgrade.
pi@raspberrypi:~ $ sudo apt update && sudo apt upgrade
Ign:1 http://raspbian.raspberrypi.com/raspbian trixie InRelease
Ign:2 http://archive.raspberrypi.com/debian trixie InRelease
Ign:1 http://raspbian.raspberrypi.com/raspbian trixie InRelease
Ign:2 http://archive.raspberrypi.com/debian trixie InRelease
Ign:1 http://raspbian.raspberrypi.com/raspbian trixie InRelease
Ign:2 http://archive.raspberrypi.com/debian trixie InRelease
Err:1 http://raspbian.raspberrypi.com/raspbian trixie InRelease
Temporary failure resolving 'raspbian.raspberrypi.com'
Err:2 http://archive.raspberrypi.com/debian trixie InRelease
Temporary failure resolving 'archive.raspberrypi.com'
All packages are up to date.
Warning: Failed to fetch http://raspbian.raspberrypi.com/raspbian/dists/trixie/InRelease Temporary failure resolving 'raspbian.raspberrypi.com'
Warning: Failed to fetch http://archive.raspberrypi.com/debian/dists/trixie/InRelease Temporary failure resolving 'archive.raspberrypi.com'
Warning: Some index files failed to download. They have been ignored, or old ones used instead.
Summary:
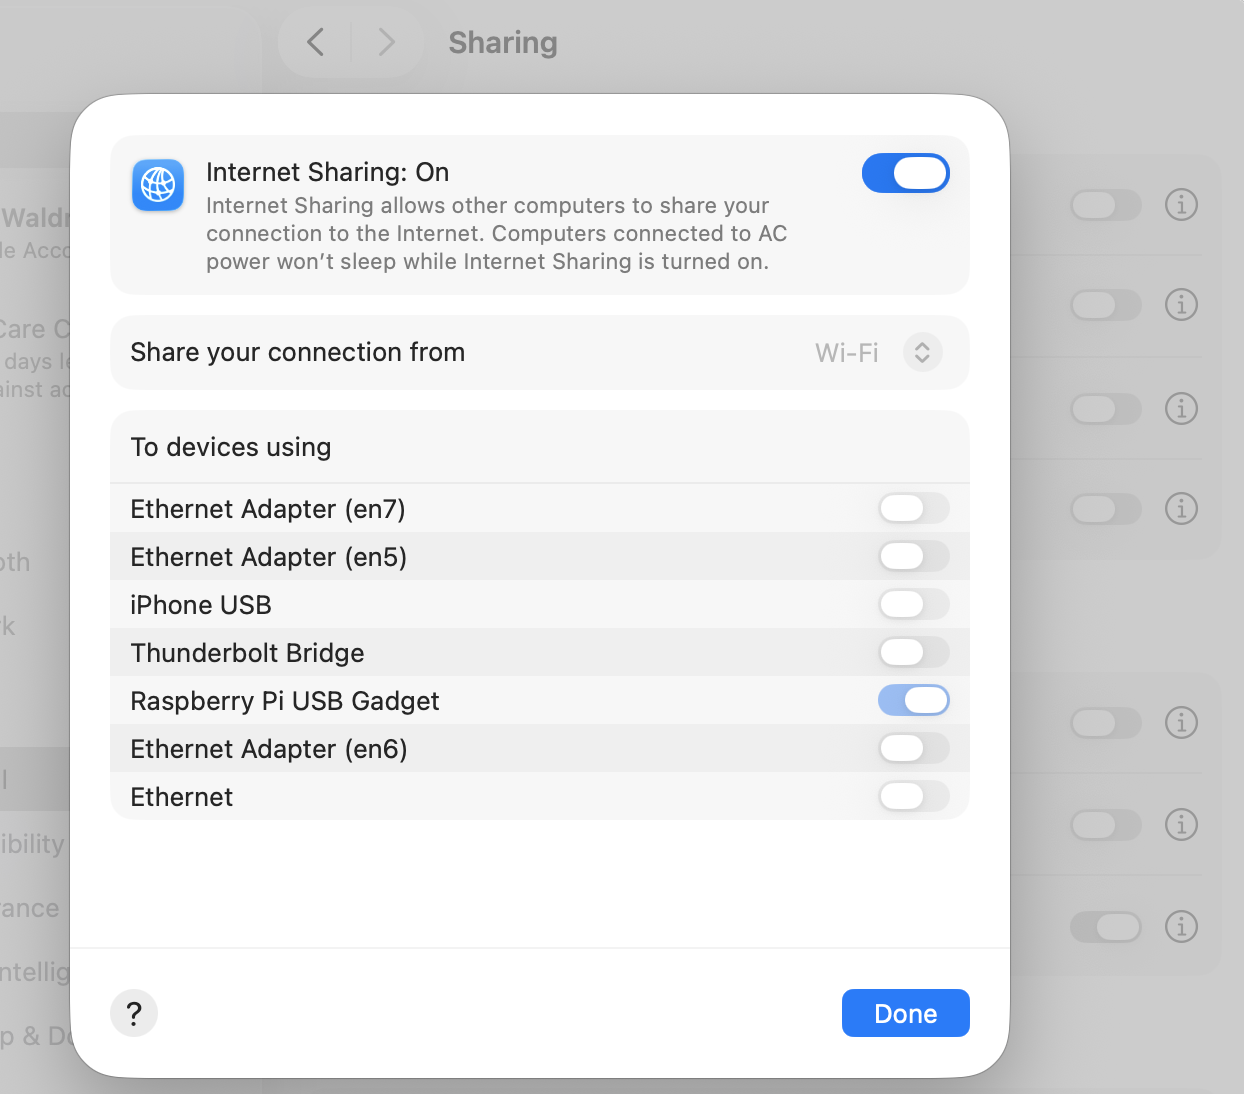
Upgrading: 0, Installing: 0, Removing: 0, Not Upgrading: 0What we're seeing here is lack of internet connectivity over the gadget tether. Not to worry, this is a Mac configuration issue. To resolve this, head over to "General -> Sharing" on Mac. Toggle on "Internet Sharing" and ensure the device is selected. Now reboot the Pi.
We should be connected to the internet through the tether. To be sure, I'll ping something external we know should be available.
pi@raspberrypi:~ $ ping -c 1 www.google.com
PING www.google.com (142.250.176.4) 56(84) bytes of data.
64 bytes from lax17s51-in-f4.1e100.net (142.250.176.4): icmp_seq=1 ttl=115 time=42.3 ms

--- www.google.com ping statistics ---
1 packets transmitted, 1 received, 0% packet loss, time 0ms
rtt min/avg/max/mdev = 42.279/42.279/42.279/0.000 ms
Confirmed, we have internet. Now running sudo apt update && sudo apt upgrade should work just fine.
Final Thoughts
Small computers like the Raspberry Pi Zero are really cool. Struggling to connect to these little guys is not. Hopefully the solution described here does the trick.